Difference between revisions of "Rope Splicing"
(Created page with "Detailed annotated photo essay of creating a thimble eye loop splice in a piece of suitable rope. Gather your supplies! In this case, I'm using the following: * 100ft of Ams...") |
(fix wide formatting, add animatedknots link) |
||
| Line 7: | Line 7: | ||
* Sufficient quantity of stainless steel rope thimbles in appropriate size (3/16", in this case) | * Sufficient quantity of stainless steel rope thimbles in appropriate size (3/16", in this case) | ||
* Roll of electrical tape (temporary, but useful, and not pictured) | * Roll of electrical tape (temporary, but useful, and not pictured) | ||
| + | |||
https://wtf.hijacked.us/images/ropesplice/med_IMG_2413.JPG | https://wtf.hijacked.us/images/ropesplice/med_IMG_2413.JPG | ||
Have a look at the end of your rope: to lay out your splice, you need to figure out how much you're going to bury inside the rope. No idea if there is a standard for this, but I've chosen to bury around 12-15" for looks and strength. Fold your rope at the end, leaving overlap that you want to bury. Figure out how much approximately 25% of your bury length will be, then locate a place in the rope that far from where you expect the end of the rope to be after burying. This will become more clear after you try this a time or two. The goal is to have enough extra room to manipulate the rope and finish with the end buried and looking clean. | Have a look at the end of your rope: to lay out your splice, you need to figure out how much you're going to bury inside the rope. No idea if there is a standard for this, but I've chosen to bury around 12-15" for looks and strength. Fold your rope at the end, leaving overlap that you want to bury. Figure out how much approximately 25% of your bury length will be, then locate a place in the rope that far from where you expect the end of the rope to be after burying. This will become more clear after you try this a time or two. The goal is to have enough extra room to manipulate the rope and finish with the end buried and looking clean. | ||
| + | |||
https://wtf.hijacked.us/images/ropesplice/med_IMG_2414.JPG | https://wtf.hijacked.us/images/ropesplice/med_IMG_2414.JPG | ||
With an ending point + some extra selected as in the last step, grab on either side of this point and push both ends of the rope inward toward eachother. This will begin creating openings between the threads. This is what we'll use for the magic. | With an ending point + some extra selected as in the last step, grab on either side of this point and push both ends of the rope inward toward eachother. This will begin creating openings between the threads. This is what we'll use for the magic. | ||
| + | |||
https://wtf.hijacked.us/images/ropesplice/med_IMG_2415.JPG | https://wtf.hijacked.us/images/ropesplice/med_IMG_2415.JPG | ||
If you haven't already, test fit your thimble. | If you haven't already, test fit your thimble. | ||
| + | |||
https://wtf.hijacked.us/images/ropesplice/med_IMG_2416.JPG | https://wtf.hijacked.us/images/ropesplice/med_IMG_2416.JPG | ||
Working backward from the end point you created openings in, do similar along the length working back toward the intended eye point. | Working backward from the end point you created openings in, do similar along the length working back toward the intended eye point. | ||
| + | |||
https://wtf.hijacked.us/images/ropesplice/med_IMG_2417.JPG | https://wtf.hijacked.us/images/ropesplice/med_IMG_2417.JPG | ||
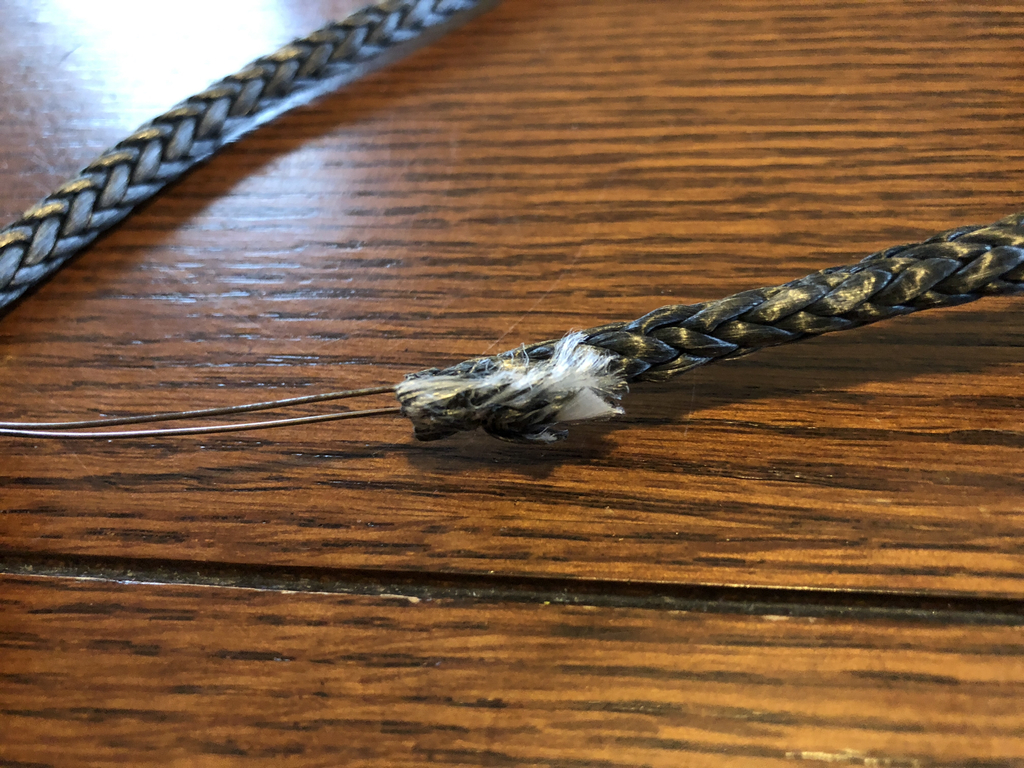
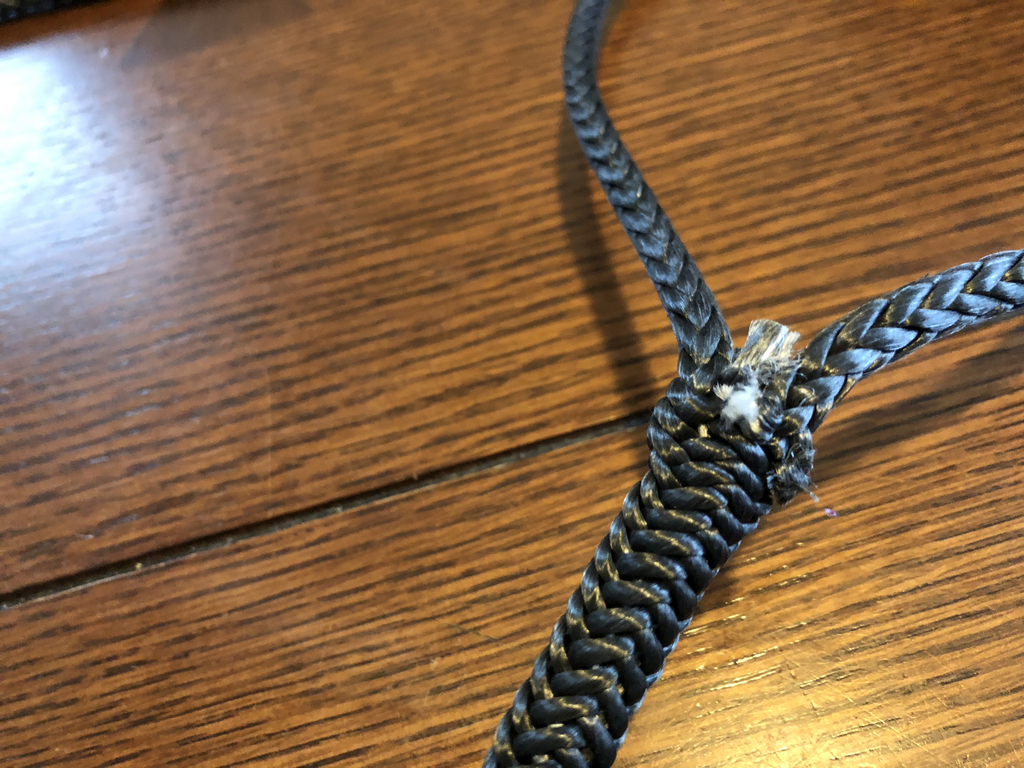
Insert your splice tool (bent wire) into the created opening at the end point and fish it carefully through the inside of the rope until you reach the bottom of the eye point. Use the created opening there to find a spot to exit the rope with the splice tool. Leave 2-3" of the splice tool visible. | Insert your splice tool (bent wire) into the created opening at the end point and fish it carefully through the inside of the rope until you reach the bottom of the eye point. Use the created opening there to find a spot to exit the rope with the splice tool. Leave 2-3" of the splice tool visible. | ||
| + | |||
https://wtf.hijacked.us/images/ropesplice/med_IMG_2418.JPG | https://wtf.hijacked.us/images/ropesplice/med_IMG_2418.JPG | ||
| + | |||
https://wtf.hijacked.us/images/ropesplice/med_IMG_2419.JPG | https://wtf.hijacked.us/images/ropesplice/med_IMG_2419.JPG | ||
| + | |||
https://wtf.hijacked.us/images/ropesplice/med_IMG_2420.JPG | https://wtf.hijacked.us/images/ropesplice/med_IMG_2420.JPG | ||
Spread open the wire loop and carefully pull some of the end of the rope through. | Spread open the wire loop and carefully pull some of the end of the rope through. | ||
| + | |||
https://wtf.hijacked.us/images/ropesplice/med_IMG_2421.JPG | https://wtf.hijacked.us/images/ropesplice/med_IMG_2421.JPG | ||
Mash a bit of the rope over that you pulled through the wire loop. | Mash a bit of the rope over that you pulled through the wire loop. | ||
| + | |||
https://wtf.hijacked.us/images/ropesplice/med_IMG_2422.JPG | https://wtf.hijacked.us/images/ropesplice/med_IMG_2422.JPG | ||
Begin pulling the wire back through, you'll certainly encounter quite a bit of resistance as the mashed over bit of rope end tries to enter the space between strands. Mash/press/massage/roll/manipulate the outside of the rope as you do this, once the bury has started, it gets a lot easier. Until then, be careful not to pull the wire free of the rope end, or you'll have to start over. | Begin pulling the wire back through, you'll certainly encounter quite a bit of resistance as the mashed over bit of rope end tries to enter the space between strands. Mash/press/massage/roll/manipulate the outside of the rope as you do this, once the bury has started, it gets a lot easier. Until then, be careful not to pull the wire free of the rope end, or you'll have to start over. | ||
| + | |||
https://wtf.hijacked.us/images/ropesplice/med_IMG_2423.JPG | https://wtf.hijacked.us/images/ropesplice/med_IMG_2423.JPG | ||
| + | |||
https://wtf.hijacked.us/images/ropesplice/med_IMG_2424.JPG | https://wtf.hijacked.us/images/ropesplice/med_IMG_2424.JPG | ||
Keep pulling/rolling the rope between your fingers/etc, almost there. Feel free to pull the end out and remove the wire. | Keep pulling/rolling the rope between your fingers/etc, almost there. Feel free to pull the end out and remove the wire. | ||
| + | |||
https://wtf.hijacked.us/images/ropesplice/med_IMG_2425.JPG | https://wtf.hijacked.us/images/ropesplice/med_IMG_2425.JPG | ||
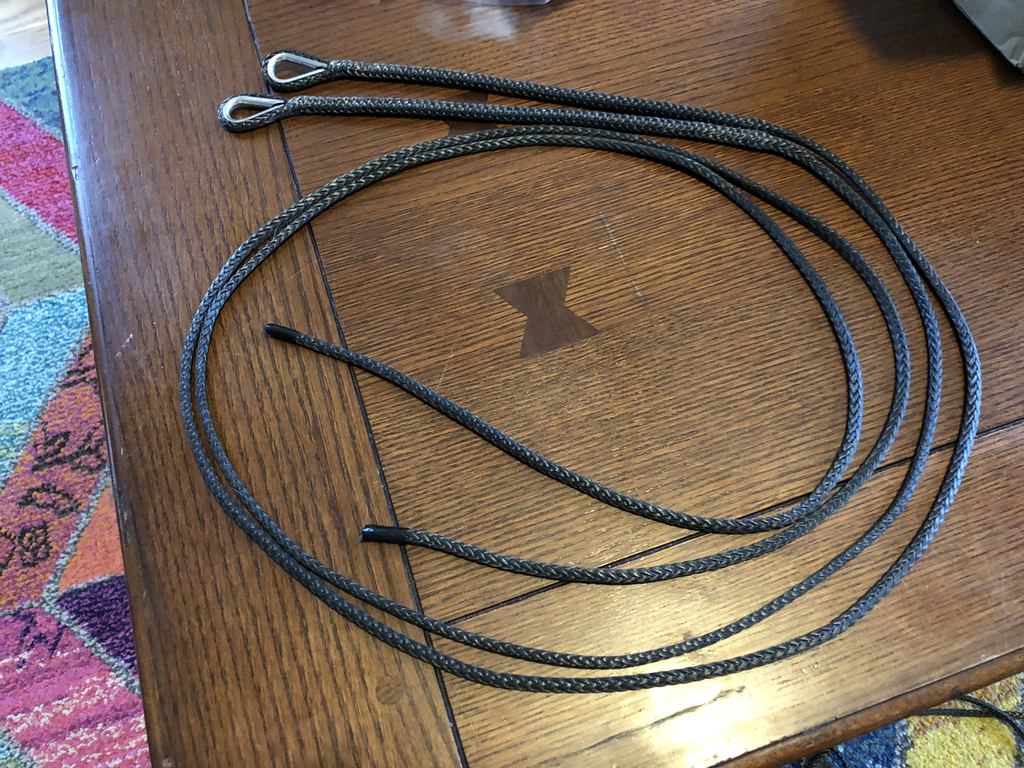
Two custom slings with one end each completed. | Two custom slings with one end each completed. | ||
| + | |||
https://wtf.hijacked.us/images/ropesplice/med_IMG_2426.JPG | https://wtf.hijacked.us/images/ropesplice/med_IMG_2426.JPG | ||
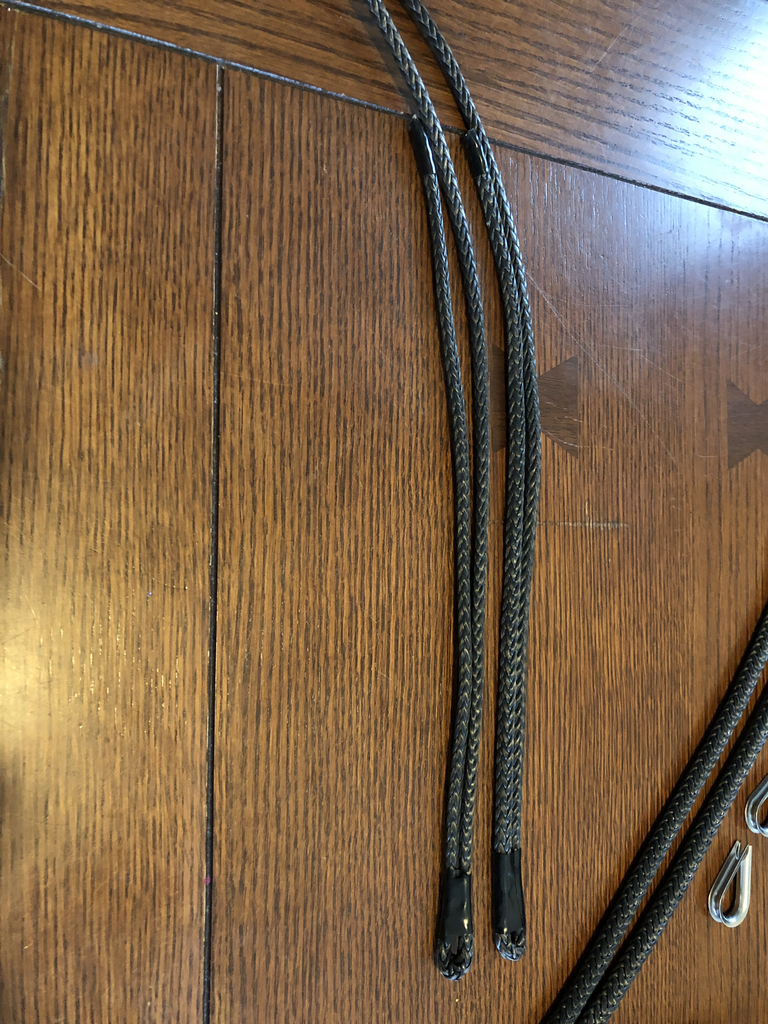
Since I'm making a pair of identical length slings (or as close to it as I can get on my coffee table..), I carefully measure out and tape both in various places to allow for identical moves (thimble placement, bury start/stop, etc.) | Since I'm making a pair of identical length slings (or as close to it as I can get on my coffee table..), I carefully measure out and tape both in various places to allow for identical moves (thimble placement, bury start/stop, etc.) | ||
| + | |||
https://wtf.hijacked.us/images/ropesplice/med_IMG_2427.JPG | https://wtf.hijacked.us/images/ropesplice/med_IMG_2427.JPG | ||
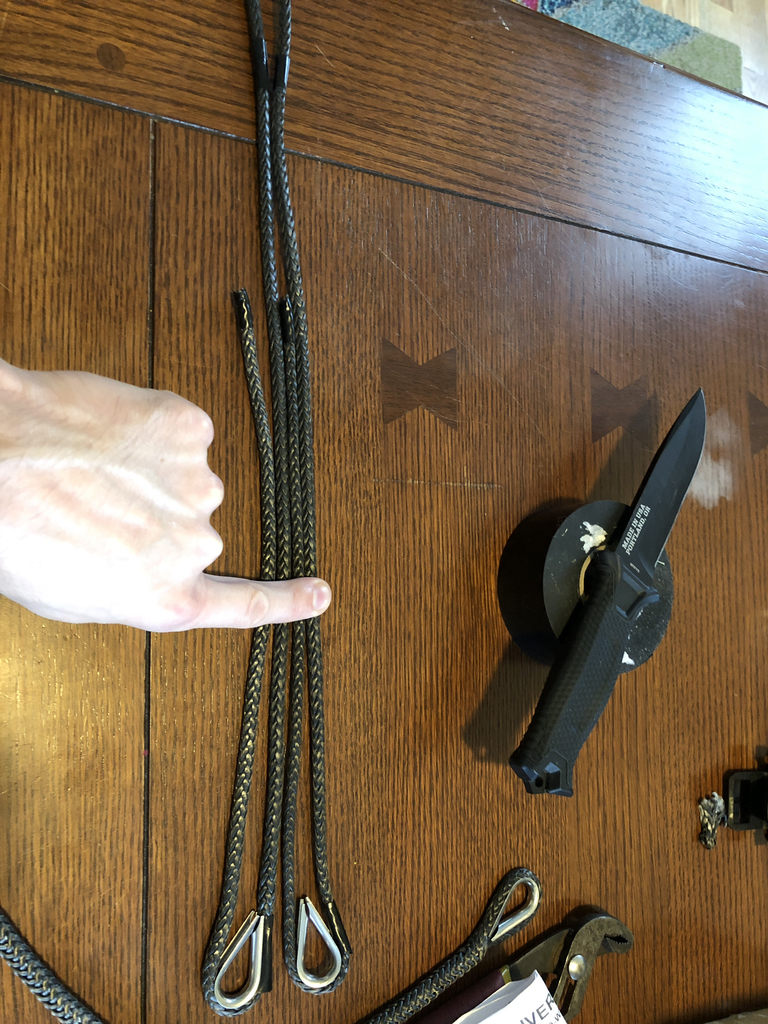
Test fit the thimbles before finishing up, then repeat the process above on these two ends. | Test fit the thimbles before finishing up, then repeat the process above on these two ends. | ||
| + | |||
https://wtf.hijacked.us/images/ropesplice/med_IMG_2428.JPG | https://wtf.hijacked.us/images/ropesplice/med_IMG_2428.JPG | ||
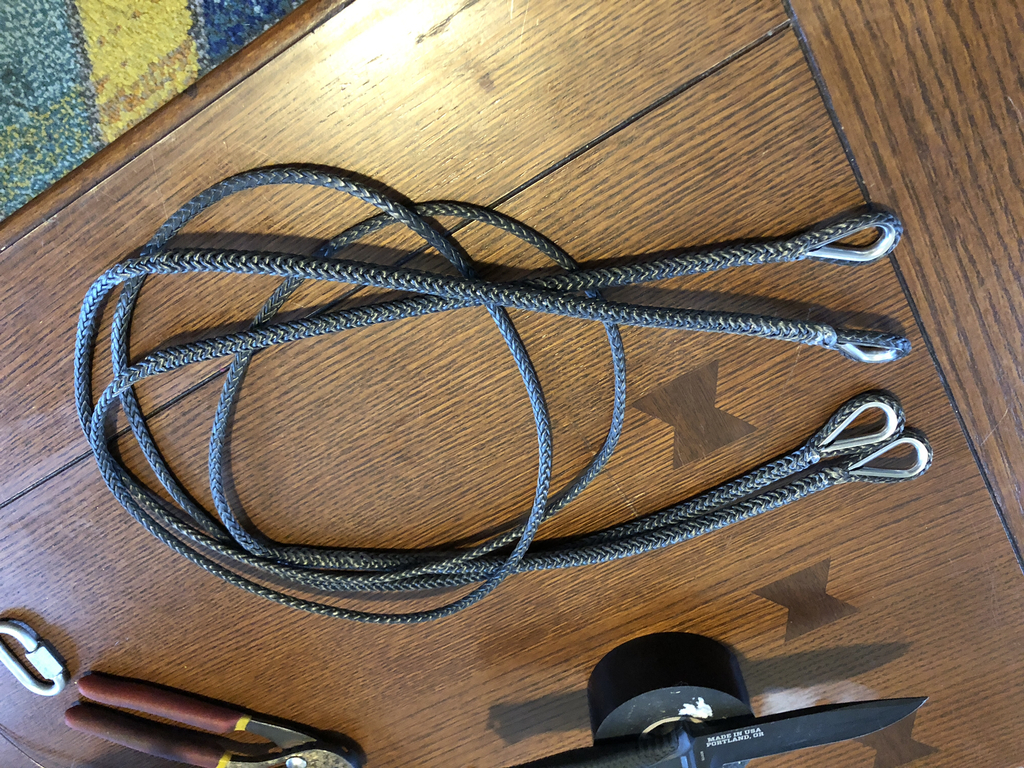
Finished product(s). | Finished product(s). | ||
| + | |||
https://wtf.hijacked.us/images/ropesplice/med_IMG_2429.JPG | https://wtf.hijacked.us/images/ropesplice/med_IMG_2429.JPG | ||
Hope this was useful and well illustrated. I've used the technique for various hammock/swing making/hanging activities, and it should translate well to many other tasks. If you require extra strength in the buried splice, you can always run a few stitches through with some suitable thread and a needle. | Hope this was useful and well illustrated. I've used the technique for various hammock/swing making/hanging activities, and it should translate well to many other tasks. If you require extra strength in the buried splice, you can always run a few stitches through with some suitable thread and a needle. | ||
| + | |||
| + | For more info, consider visiting https://www.animatedknots.com/ which does a great job of breaking down a number of other splices and rope related knowledge. | ||
Latest revision as of 08:03, 19 June 2020
Detailed annotated photo essay of creating a thimble eye loop splice in a piece of suitable rope.
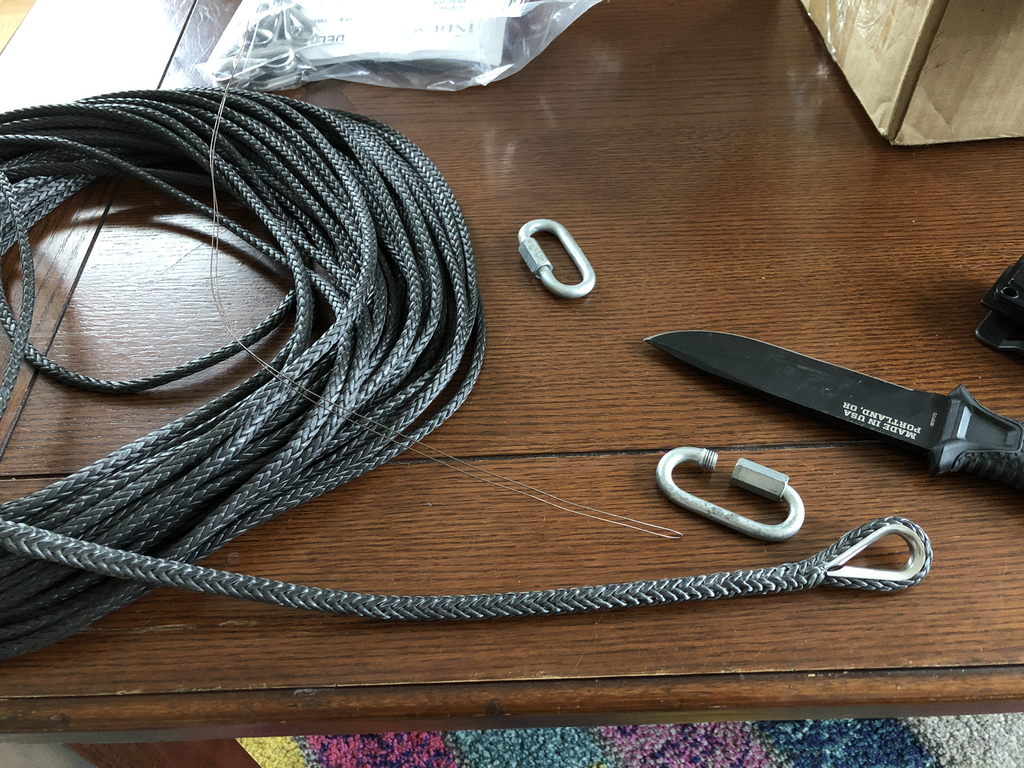
Gather your supplies! In this case, I'm using the following:
- 100ft of Amsteel Blue 3/16" rope in black: https://www.samsonrope.com/mooring/amsteel--blue
- Sharp knife, you know, for cutting things.
- Piece of MIG welding wire roughly 30" long, bent in half, but any thin, stiff wire will likely do.
- Sufficient quantity of stainless steel rope thimbles in appropriate size (3/16", in this case)
- Roll of electrical tape (temporary, but useful, and not pictured)
Have a look at the end of your rope: to lay out your splice, you need to figure out how much you're going to bury inside the rope. No idea if there is a standard for this, but I've chosen to bury around 12-15" for looks and strength. Fold your rope at the end, leaving overlap that you want to bury. Figure out how much approximately 25% of your bury length will be, then locate a place in the rope that far from where you expect the end of the rope to be after burying. This will become more clear after you try this a time or two. The goal is to have enough extra room to manipulate the rope and finish with the end buried and looking clean.
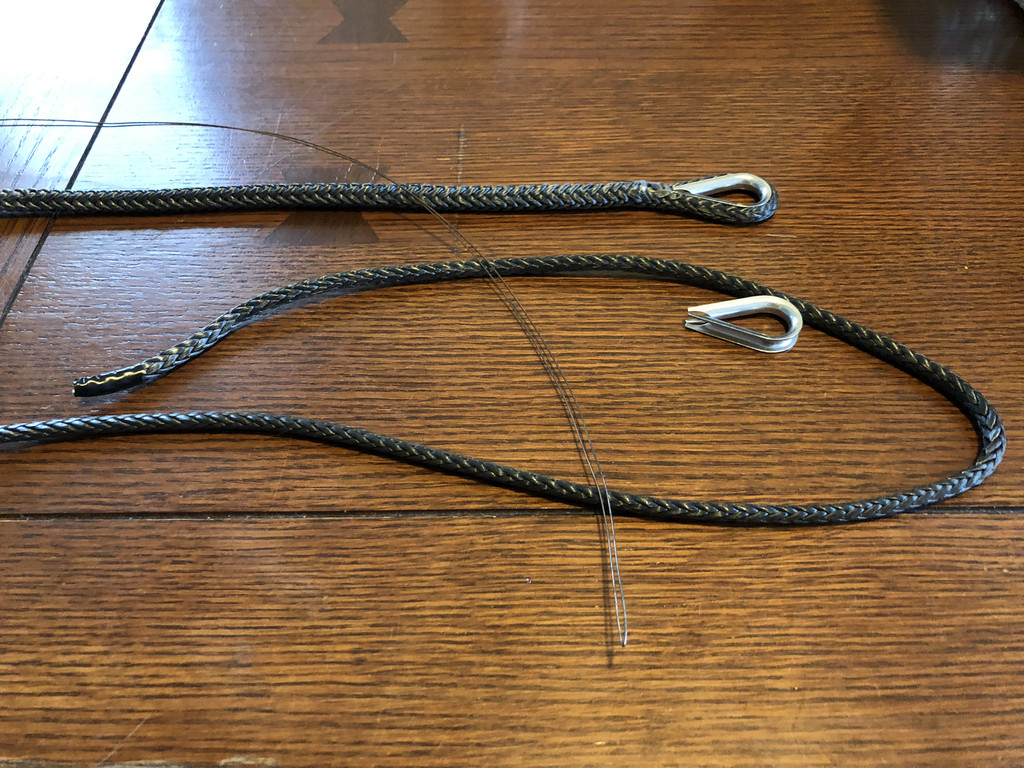
With an ending point + some extra selected as in the last step, grab on either side of this point and push both ends of the rope inward toward eachother. This will begin creating openings between the threads. This is what we'll use for the magic.
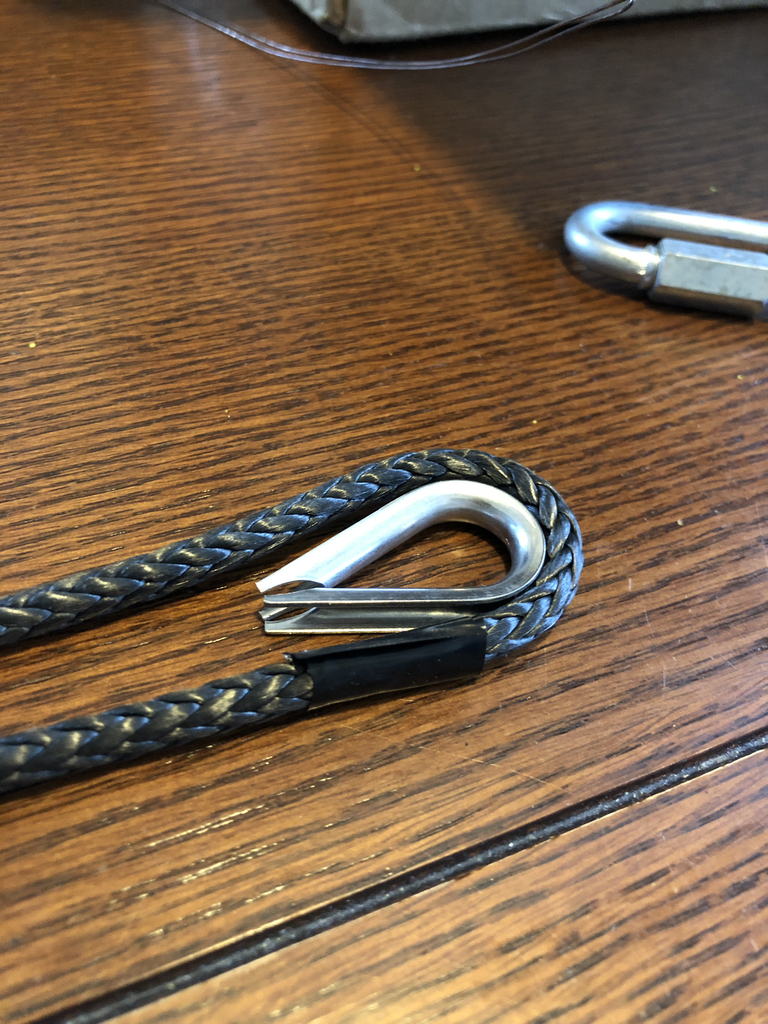
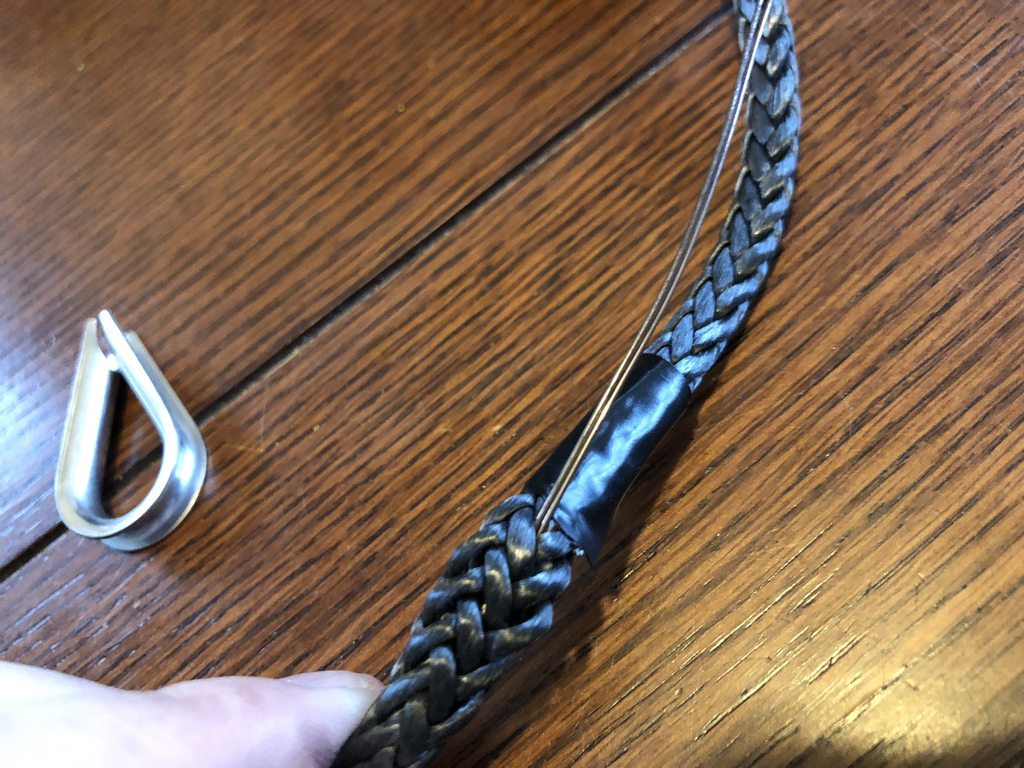
If you haven't already, test fit your thimble.
Working backward from the end point you created openings in, do similar along the length working back toward the intended eye point.
Insert your splice tool (bent wire) into the created opening at the end point and fish it carefully through the inside of the rope until you reach the bottom of the eye point. Use the created opening there to find a spot to exit the rope with the splice tool. Leave 2-3" of the splice tool visible.
Spread open the wire loop and carefully pull some of the end of the rope through.

Mash a bit of the rope over that you pulled through the wire loop.
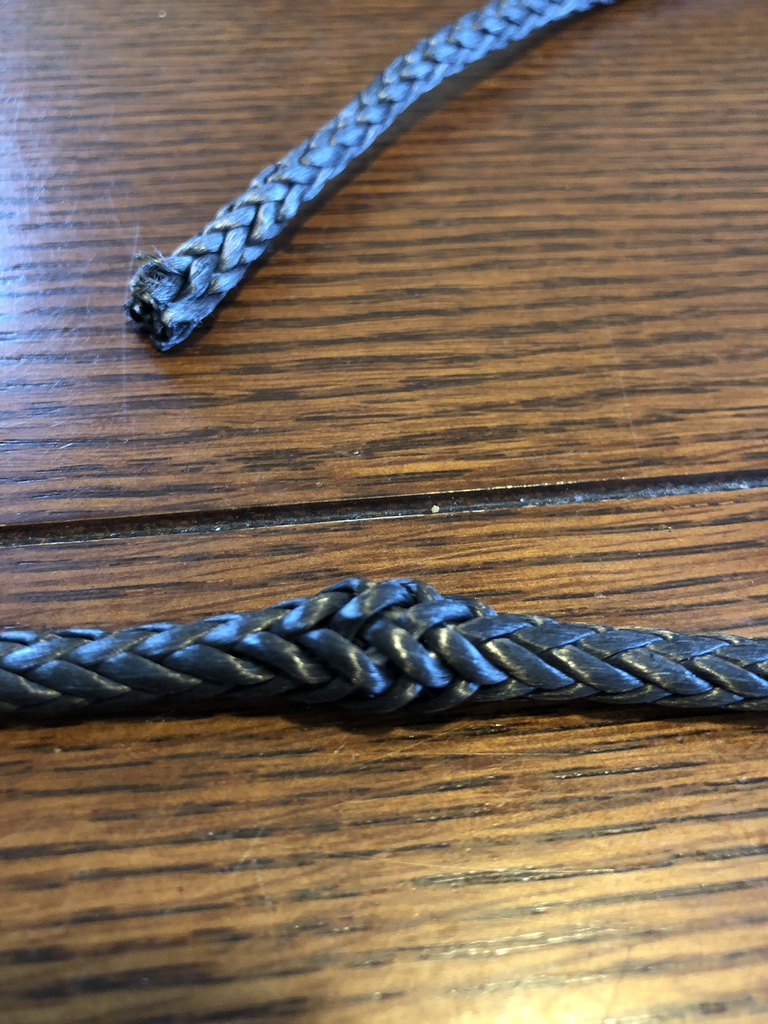
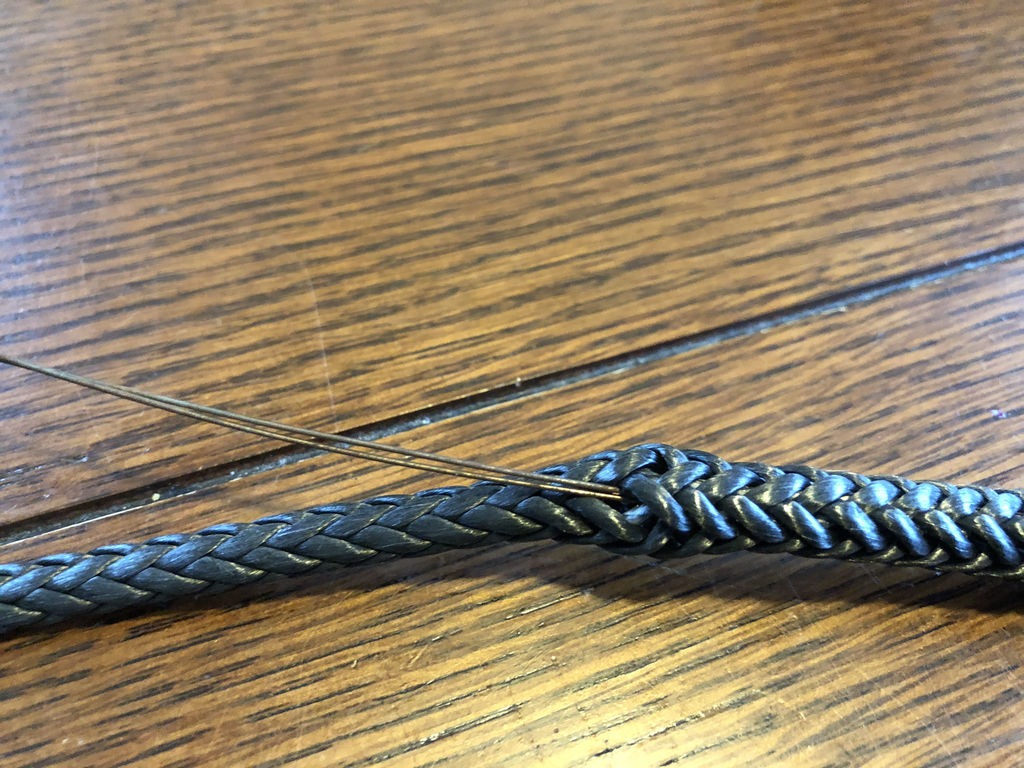
Begin pulling the wire back through, you'll certainly encounter quite a bit of resistance as the mashed over bit of rope end tries to enter the space between strands. Mash/press/massage/roll/manipulate the outside of the rope as you do this, once the bury has started, it gets a lot easier. Until then, be careful not to pull the wire free of the rope end, or you'll have to start over.
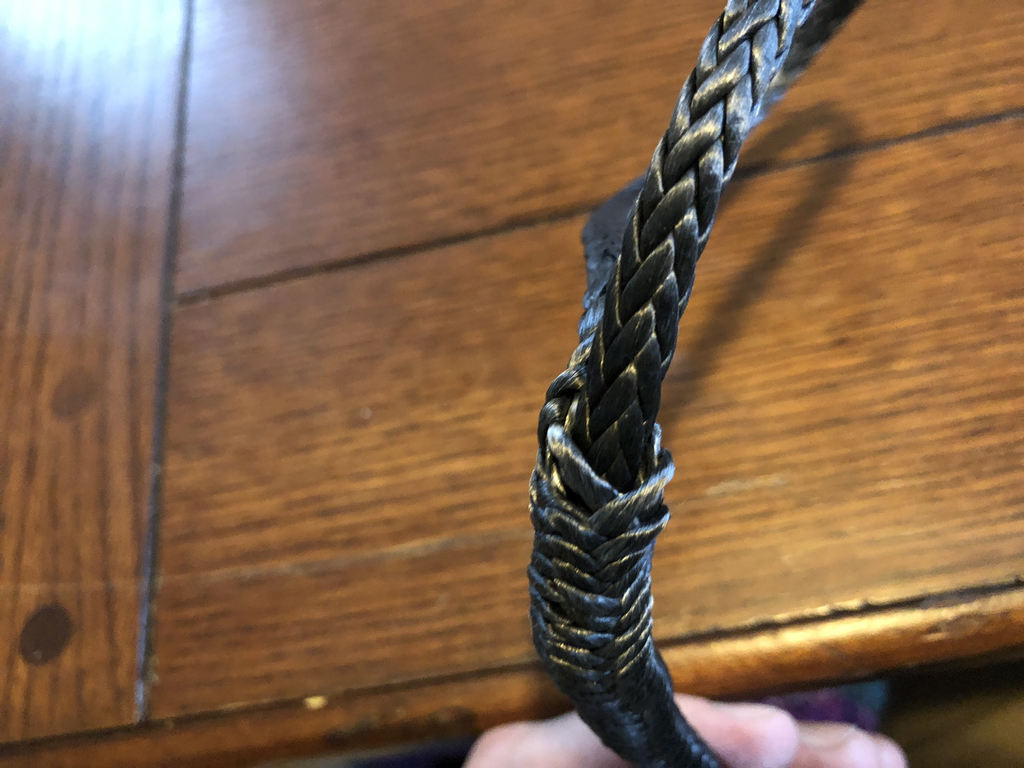
Keep pulling/rolling the rope between your fingers/etc, almost there. Feel free to pull the end out and remove the wire.
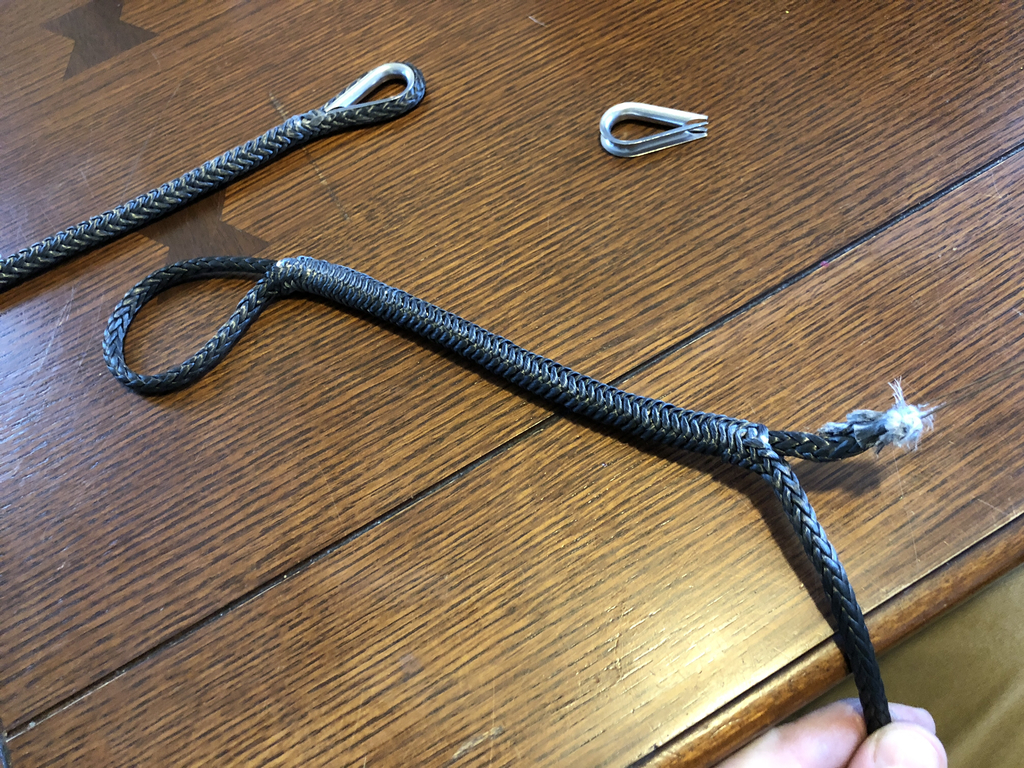
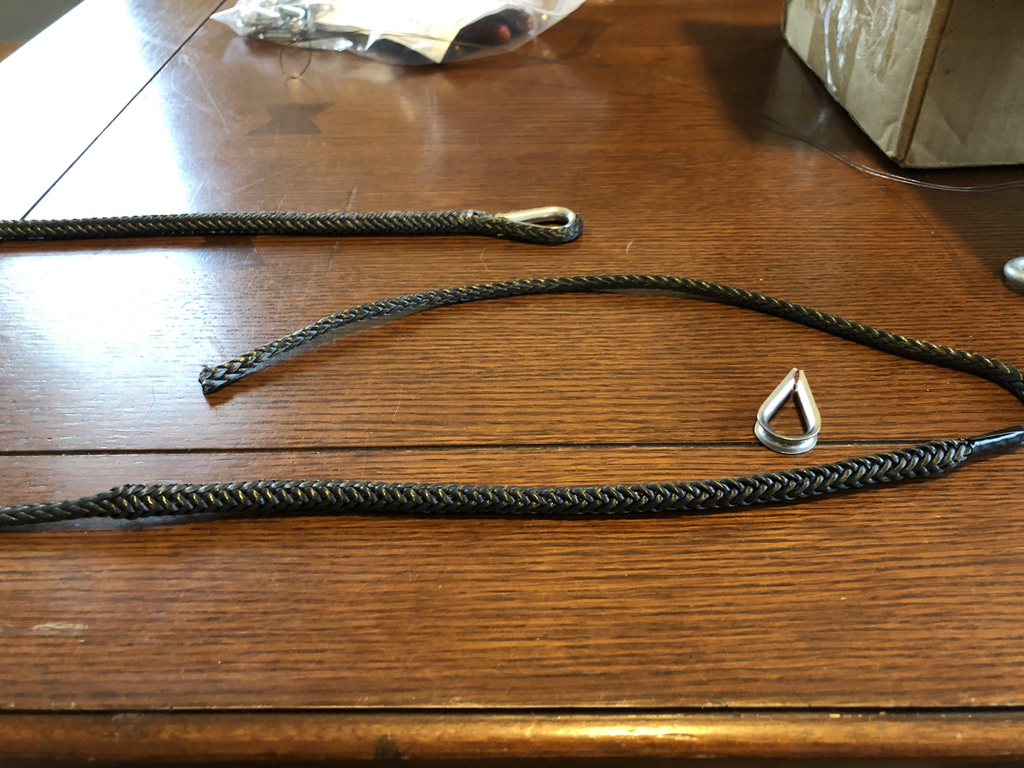
Two custom slings with one end each completed.
Since I'm making a pair of identical length slings (or as close to it as I can get on my coffee table..), I carefully measure out and tape both in various places to allow for identical moves (thimble placement, bury start/stop, etc.)
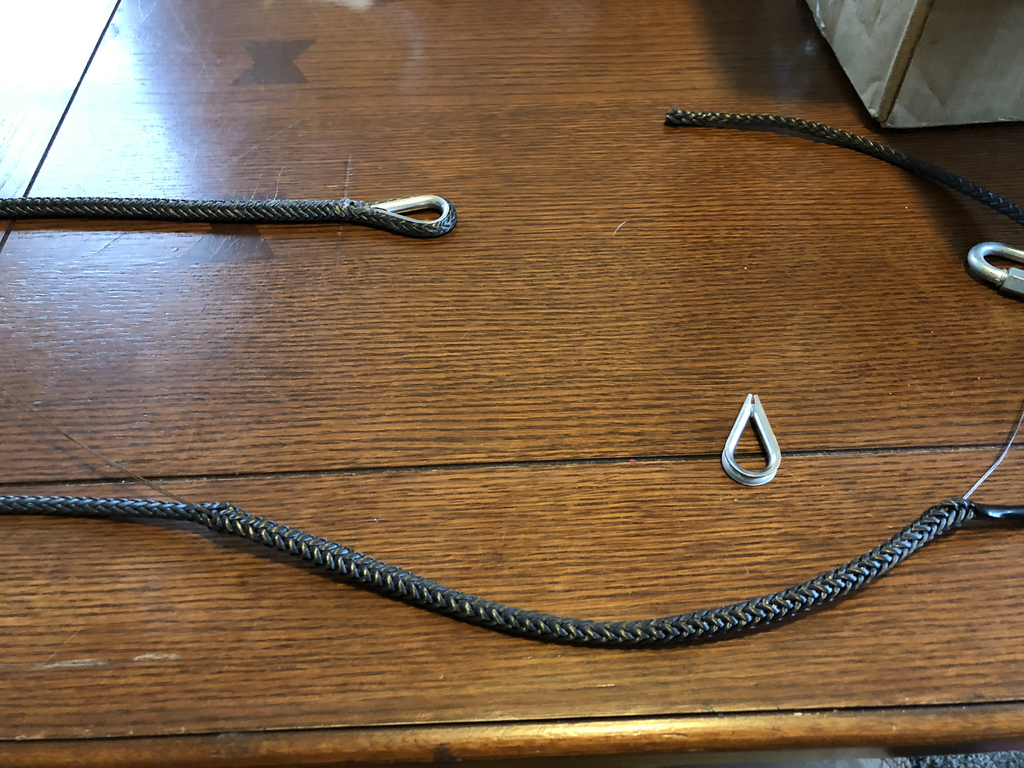
Test fit the thimbles before finishing up, then repeat the process above on these two ends.
Finished product(s).
Hope this was useful and well illustrated. I've used the technique for various hammock/swing making/hanging activities, and it should translate well to many other tasks. If you require extra strength in the buried splice, you can always run a few stitches through with some suitable thread and a needle.
For more info, consider visiting https://www.animatedknots.com/ which does a great job of breaking down a number of other splices and rope related knowledge.